works in progress
1. project life
yes, i jumped on the bandwagon. i did this project in 2009 and kept up with it the whole year. it is one of my favorite albums. last year i felt like i took a picture a day but didn't make nearly as many layouts as i wanted to. so, this year i felt like if i did project life i could get my pictures into an album and scrapbook just the pictures that warranted a full layout. kind of took the pressure off.
i am inspired by so many other people that are doing this. i have joined the project life community but am just doing what feels right to me. keeping ephemera that means something to me and adding it to the book. very easy for me to do and keep up.
here's one of my completed weeks.
i'm printing my pictures once a week. sometimes at home, but mostly at costco. i round the corners and add the day stickers and slip them into the page protector. then i write something on the journaling card and call it done. this week i included sofia's clues from her share bag at preschool. she brought in her minnie mouse doll in case you couldn't guess by the clues. on the other side i included a ticket stub and a page from the program of a concert we went to.
you can learn more about project life here.
2. a layout
here's the layout i'm doing based on my 5 people 12 times project.
at this point i haven't decided if this will be an album of it's own or if i will just throw it into my project life album. i used a we r memory keepers photo sleeve for the extra photos and enlarged the one i liked to 8x10. i think i'll just stick it down on the anna griffin paper and add a title. then i will print the journaling from my blog post and add that to a separate page protector in between these pages. you can see that i am using some old product, but it's things that i really love.
3. 40th birthday album
here's where i confess that i haven't put together my album from my 40th birthday. i have the album and i bought the product last year. but i haven't done anything with it. i don't even have the pictures printed. but i started it and i hope to finish it before my 41st birthday next month.
i'm using an american crafts 8x8 album and the pink paislee queen bee collection along with some rhinestones and flowers. my plan is to keep it simple and uniform. i took stacy julian's finish line scrapbooking class last year at cha and was so happy with that finished album. i think that is what i will do this time around. here are the first two pages.
4. road trip 2010
i wanted to create an on the road scrapbook that i could work on while we were on vacation. i made the scrapbook before we left and took a little kit of essentials with me. i was able to get a lot of it done on the road. but along with the instax photos i wanted to include photos that i took with my slr as well, those would have to wait until we got home. i continued to collect tickets and receipts to scrap with those photos. well we moved my scrapbook stuff into boxes for a while and i either couldn't find the book or i couldn't find my stuff. so it's in limbo right now. but i'm sure i'll get it finished before this year's summer vacation.
5. a completed layout
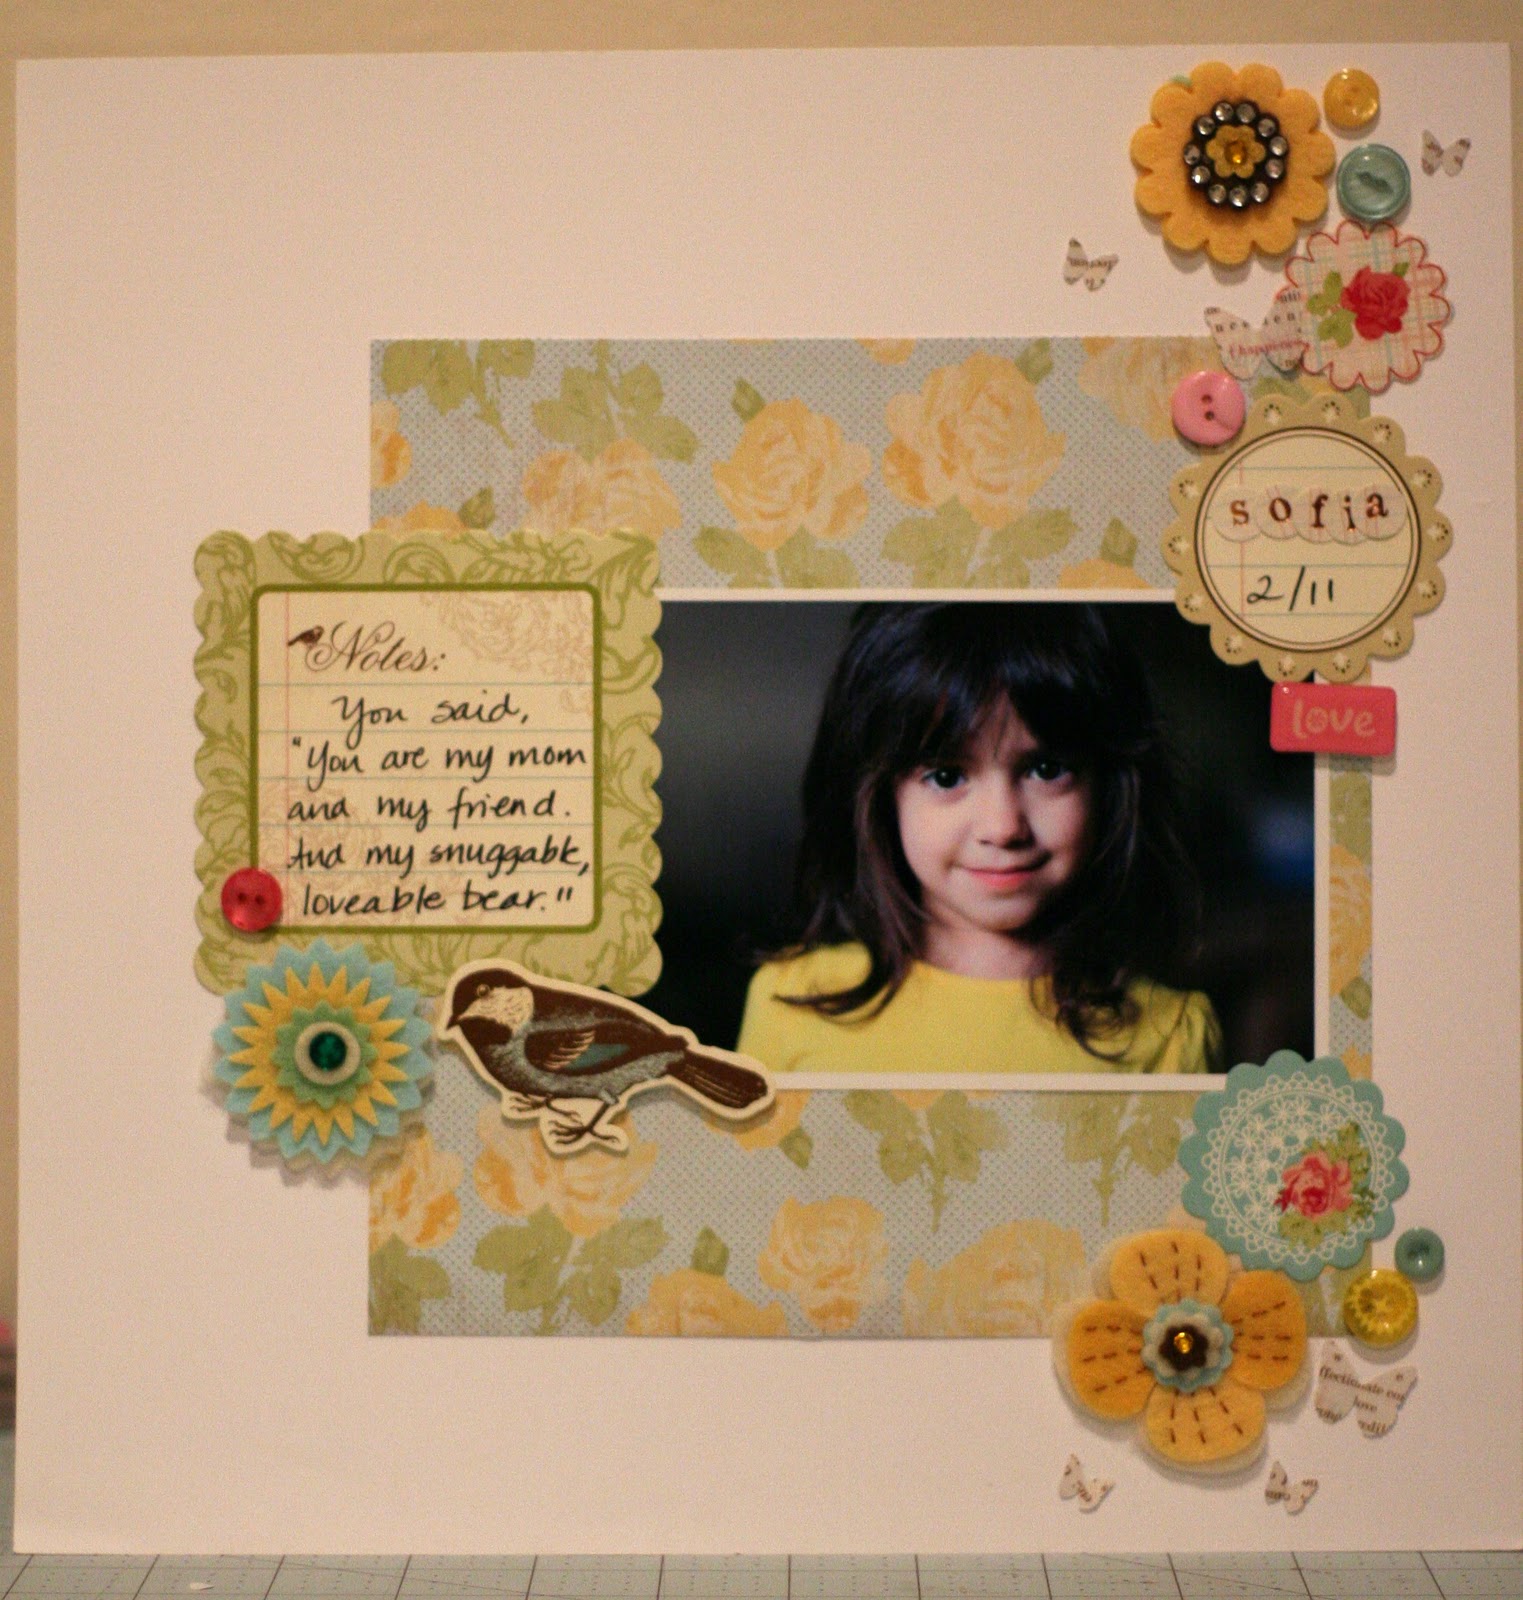
and just so i don't look like a total slacker, here is a layout i did finish. i am participating in shimelle's class over at two peas in a bucket and this was the assignment and sketch for january. i absolutely love this line from colorbok that i found at joann's recently. it's called flea market. this yellow and blue paper is one of my favorites. i followed her sketch pretty closely and love how the page turned out. used up some ki memories flowers that i had been saving and the martha stewart butterfly punch. the class is free if you want to check it out.
i am keeping some of these projects in the hefty one zip 2.5 gallon bags. they are perfect for the 12x12 paper, photos and any other product that i need. i can dump everything out on my work table, do some work and then put it all away. and they don't take up very much room. planning on finishing up these projects and posting them here soon.
have a wonderfully creative 3 day weekend.
Showing posts with label crafting. Show all posts
Friday, February 18, 2011
Wednesday, February 9, 2011
he/she loves minibook
here's a quick mini book that i made over the weekend to celebrate valentine's day. i started with a 5x6 chipboard mini book that i bought years ago from peachy cheap. sorry i don't remember who makes it. and then on a recent visit to michael's i found this beautiful anna griffin paper from the valentina collection on sale for .29! i knew then that the two were meant for this. add in some ek success dimensional heart stickers, a circle punch, ivory cardstock and some making memories word stickers from a few years ago and voila this mini was born.
i painted the maya road chipboard frame and heart in cream colored paint. the rest was just glued back to back. i printed the photos to 5x7 at costco and then trimmed them to size. unfortunately, i forgot to get the photos printed in lustre and now have to worry about getting fingerprints all over the photos, but i'll live with it.
with this mini i wanted a place to note the things that we love right now. i could have had everyone fill in their own things. i could have also written what i love about each person. i'll keep those ideas for another year.
are you creating something special for valentine's day. if so, please share.
i painted the maya road chipboard frame and heart in cream colored paint. the rest was just glued back to back. i printed the photos to 5x7 at costco and then trimmed them to size. unfortunately, i forgot to get the photos printed in lustre and now have to worry about getting fingerprints all over the photos, but i'll live with it.
with this mini i wanted a place to note the things that we love right now. i could have had everyone fill in their own things. i could have also written what i love about each person. i'll keep those ideas for another year.
are you creating something special for valentine's day. if so, please share.
Thursday, January 13, 2011
december daily - wrap up
i was able to finish this project all the way to the end. in years past i've missed doing the actual christmas day layout. but not this year.
i followed along with ali and used her album as the basis for mine. i used what i had on hand to put it together and just ordered a few things to keep it current. i loved the teresa collins line this year.
i didn't post on flickr or my blog like i wanted to. and i don't want to post all of the pages now. but i will show you my favorites.
i used the free download as my opening page. the snowflake is a felt ornament from target. and of course the sleeve from a starbucks coffee.
day 4 - a trip to disneyland with the kids. and then a chance to explore the park on our own. each of the photos flips open to reveal the journaling.
day 8 - i printed the photo of my coffee bean mug to 6x8 and glued it directly to the back of day 7. then i added a bag from starbucks (without the pastry). there is a little bit of journaling inside with thoughts on a peaceful christmas season.
day 11 - date night with b. i used a baseball card protector to divide the pages. and i included an instax photo of us and the business card from the yogurt place we went to after dinner.
day 14 - i love that this day includes a picture of each of us. so simple to put this together.
day 18 - i included the packaging from our harry and david delivery. another baseball card protector with photos of little gifts we got throughout december. (sorry for the blurry photo.)
day 19 - the back of the baseball card protector has photos of the kids and the trifle i made for dessert. and i love this page with a photo of bobby's grandparents and us.
day 24 - christmas eve. there is a transparency in the middle that i added a rub on and numbers to. then a picture of the kids in their christmas pajamas.
dec 25 - finally a christmas day layout. a picture of us in the morning printed at 6x8. i attached some canvas ribbon from michael's directly to the photo. there is a transparency with the date and some holly in the middle. then for the last page i printed some photos using the contact page setting in iphoto. i added descriptions on the cardstock for a look at our christmas day.
my book is full and the binding rings are really too small. but i'm ok with that and will leave it as is. it's time to put this away.
what made it easy for me is that i put all of the pages together ahead of time. i don't usually do this project like that. i like to make decisions the day of. but i really loved ali's book and wanted to make this as easy as possible. and i'm happy with how it worked out.
you can check out some other favorites here:
elise
amy
wilna - scroll down to see her pages.
Monday, January 10, 2011
goodbye christmas - card project
this weekend we put away christmas. always a little sad about it but it felt good to get some much needed space back in our house. i don't have a lot of decorations so it went pretty quick. we even put the boxes away so that they don't sit on the garage floor for 6 months.
a few years ago i struggled with what to do with all of the christmas cards we get throughout the season. now that everyone is sending photo cards i just couldn't throw them away. so here's what i came up with.
here's how we display our cards as we get them.
i tape them directly to the wall. i love having them on display like this. after christmas i carefully take them down and remove the tape. i pick one card where i like the graphic or the colors, a traditional card not a photo card. that card becomes the cover of the book.
i loved the colors, and the cute little birds. i take some chipboard, usually packaging from something i ordered and cut it to size.
i measured it to 6x7.5 inches. i use my exacto knife and ruler to cut. then i use my cropadile to punch holes in the chipboard. i glued the card to the chipboard and added the year with red glitter stickers.
i use the chipboard as a guide to punch all of the cards that i am keeping. i am considering getting one of these to make it even easier next year. for this book i used basic office supply rings to keep them all together but you can use ribbon if you have that on hand.
unfortunately, i did not get a picture of the finished product. it's already packed away, but here are some pictures from my other books.
sometimes i get fancy and paint the chipboard or stamp the date. here i used ribbon to keep the books together.
i realized that i never bound my book for 2009, so i did that one this year too.
in december i pull these out and put them in a basket as part of my holiday decor. we all enjoy looking through them. eventually i will throw some of them away. but for now it is an easy way to keep them together.
what about you? do you keep or throw away your cards?
a few years ago i struggled with what to do with all of the christmas cards we get throughout the season. now that everyone is sending photo cards i just couldn't throw them away. so here's what i came up with.
here's how we display our cards as we get them.
![]() |
| Photo from 2009 |
this is the one i picked this year:
i loved the colors, and the cute little birds. i take some chipboard, usually packaging from something i ordered and cut it to size.
i measured it to 6x7.5 inches. i use my exacto knife and ruler to cut. then i use my cropadile to punch holes in the chipboard. i glued the card to the chipboard and added the year with red glitter stickers.
i use the chipboard as a guide to punch all of the cards that i am keeping. i am considering getting one of these to make it even easier next year. for this book i used basic office supply rings to keep them all together but you can use ribbon if you have that on hand.
unfortunately, i did not get a picture of the finished product. it's already packed away, but here are some pictures from my other books.
sometimes i get fancy and paint the chipboard or stamp the date. here i used ribbon to keep the books together.
i realized that i never bound my book for 2009, so i did that one this year too.
in december i pull these out and put them in a basket as part of my holiday decor. we all enjoy looking through them. eventually i will throw some of them away. but for now it is an easy way to keep them together.
what about you? do you keep or throw away your cards?
Subscribe to:
Posts (Atom)